Challenger II

September 29, 2007

steering

Filed under: Uncategorized — pocomoonshine @ 8:21 pm

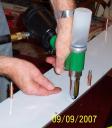
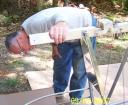
Tonight we hooked the rudder pedals to the front wheel fork and temporarily put the front wheel on. Seems like a nice easy straightforward job, however the list of little steps is enormous. It is a great feeling of accomplishment to fit, lube, adjust and tighten and have things look pretty good and work flawlessly.

steering.jpg

Click on picture to enlarge.

gas tank

Filed under: Uncategorized — pocomoonshine @ 7:46 am

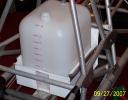
gas-tank.jpgGas tank is installed!

The instruction manual is funny; it lists the materials needed to complete the gas tank installation, gives the steps required, and the estimated time to complete the task. Estimated time in manual to install gas tank, 1 hour. Actual time it took to install gas tank, 3 1/2 hours. Guess I’m slow.

On to more rivets on the seats and cross braces, then ???

September 26, 2007

moving along

Filed under: Uncategorized — pocomoonshine @ 8:44 pm

tail-feather-fit.jpgI had a four day weekend, guess what I did most of the time?

 Pretty exciting to get a lot of little jobs completed, tail feathers fit and drilled for supports,

tail-boom.jpg

reinforcing plates on tail boom, front wheel push rods installed, start on fuel tank installation, etc.

tank1.jpg

I even got a chance to sit in the cockpit and say vroom-vroom.

vroom.jpg

September 24, 2007

Flaperons

Filed under: Uncategorized — pocomoonshine @ 6:51 am

A lot has happened in the 4 days since I last posted, lots of work but little in the photogenic realm.

I drilled the holes for the hinges in the left wing and that job went well, got my 30 degrees up and down travel.

All that we can do on the wings has been done, at least until the new fiberglass wingtips arrive, so they have been stored away and the fuselage brought into the work area.

The flaperon bellcrank was assembled, installed and adjusted. A lot of head-work required on that project. Pretty satisfying to take a pile of various parts and pieces and assemble them into a working mechanism.

Flaperon, a funny word, combination of flaps and ailerons. There are no flaps on the Challenger, so the ailerons are made to move downward together by the means of a hand crank in the cockpit.  The design also allows for an upward travel, above neutral, and that action has an effect on the performance at cruise speed. What effect I don’t know, I guess you have to be an aeronautical engineer to know.

September 19, 2007

30 degrees up/30degrees down!

Filed under: Uncategorized — pocomoonshine @ 7:30 pm

aileron-hinge.jpgIt is hard to imagine, but the four aileron hinges on the right wing are temporarily installed and the aileron actually goes up 30 degrees and down 30 degrees. Wow!

30-degrees-up.jpgaileron-neutral.jpg30-degrees-down.jpg

On to the left wing, I am flying now! (Well not yet, still have a l-o-o-ong way to go)

September 18, 2007

wing ribs

Filed under: Uncategorized — pocomoonshine @ 6:44 pm

Another day closer to flying? Yes, one day at a time, one rivet at a time and there will be an airplane in our future. wing-ribs.jpg

All of the wing ribs have been drilled, placed, leveled, and riveted. As I started the wing ribs, it was hard to visualize the end result. Now as I see the wings take shape, a true airfoil shape, it is pretty exciting!

The drilling of the aileron hinges is next. I have read up on the procedure and think I have it in my mind. The doubts sometimes come from surprising sources. The hinges need to be exact because the aileron travel, both upward and downward, has to be enought to effectively control the airplane in flight. The doubt creeps in from the “Challenger Chat” from fellow builders that I read. Here are stories of “do you really need 30 degrees of up travel, I only have 25?” Once you have drilled the holes in the spar, it is very difficult if not impossible to move them an eighth or sixteenth of an inch to adjust the aileron travel.

Stay tuned, hinges are next!  

September 15, 2007

264 is the magic number

Filed under: Uncategorized — pocomoonshine @ 5:07 pm

boxing-in.jpgSince my last post we have been steadily working away at preparing the wings. The wings are all boxed in, both ends of both wings. This is done to stiffen the wing so as you are flying there is less wing flex.

ready-to-drill.jpg264 holes need to be drilled in the wing ribs before we can even think of installing them on the wing, 264 holes painstakingly drilled in the center of each 1/2 inch rib.

drilling-ribs.jpgDrilling is finished !!! Now on to rib placement.

In case I forgot to mention, you can click on ony of the small photos to enlarge them.

September 10, 2007

Wing Work

Filed under: Uncategorized — pocomoonshine @ 7:36 pm

boxing-in-outboard-end.jpgMore and more and more rivets.

I am boxing in the outboard end of the right wing in preparation for the fiberglass wingtip.

Mike from UltraFlite is the dealer I bought the kit from. He sure has been a huge help in keeping me straight. He has built or helped build Challengers and knows what he is talking about. Between Mike and the help from various internet sites I have been progressing quickly (in my estimation).

Jean has been a great help also, holding a part, passing out rivets, or just being there with an encouraging word.

September 9, 2007

That first rivet hole

Filed under: Uncategorized — pocomoonshine @ 7:47 pm

first-hole.jpgThe first hole you have to drill sure is a scary one. I screwed up my courage, took drill in hand and did it! That, of course after much thought, planning and fretting. But the hole has been drilled, the rivet set, and now we have taken that big step toward an airplane.

Actually, Jean and I accomplished lots on the airplane this weekend, drilling, cleco-ing, and riveting. setting-rivets.jpgcleco-city.jpg

Cleco soldiers all in neat rows.

September 4, 2007

Five months, Two weeks, Five days

Filed under: Uncategorized — pocomoonshine @ 4:03 pm

Since the order was placed, but our new airplane kit has arrived!!!!!!fuselage box

Friday was the magic “Christmas in September” day for us when the tractor-trailer carrying our new ultralight airplane pulled into the neighbor’s yard. (Neighbor on a main road, those trucks don’t fit down here on Shore Drive) When the eight packages were unlaoded it was time for me to get back to my real job at the Town Office with “visions of wing ribs in my head”.

Saturday was spent unpacking and doing a cursury inventory. Unfortunately there was a little damage to the wing tips, strut fairings and some minor pieces on the fuselage. The factory has already agreed to send new pieces, good outfit to do business with.looking-close.jpg

It is slightly overwhelming. Where do I start? Is this the right place to drill this hole? What was I thinking when I ordered this kit anyway?

More pictures will start being posted, as soon as the kit starts looking like something resembling an airplane.

Blog at WordPress.com.